This winter's project has been completed. On to the after-project project, which is making more furniture out of the scrap.
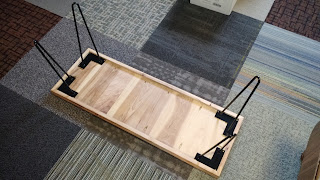
Anyway, here are the coffee and television tables.
And here are the construction photos for those who enjoy them.
The process went as follows.
I drew up the plans for the tables to figure out what materials I needed and what my cut sheet had to be. The materials got here around Christmas. Two sheets of cabinet-grade hickory plywood broken down to my specifications (character side up) and several lengths of solid hickory for the table edges and feet.
Each table top received a light sanding and pocket holes on its underside. The solid wood was cut to length with mitered ends. The top edges of the tops were covered in tape to catch any glue seepage. Spacers 3/16-in thick were taped to the top side to provide a stand-off for the edging.
Going proud on the edging was an important consideration. No piece of wood is ever straight and true. I don't have a planer and a joiner, so it is what it is. That small lip is the trade-off.
With the table top held off my bench by the spacers and with the edging held flush, I glued-and-screwed the edging to the plywood, making each table top.
Legs were made by cutting the scraps in four-inch lengths and joining them with wood glue and finish nails driven with an air nailer. Those legs were attached to the bottom using pocket hole screws. laid flat, the feet elevate the bottom table by about an inch. With the feet inset, it gives the appearance of the thing floating above the floor.
Before finishing I thoroughly cleaned my shop, which gets dusty with all the cutting, drilling and sanding.
Each table top was covered with two coats of an oil-based polyurethane. Acrylic (water-based polyurethane) is clear and raw hickory is very pale. Using an oil-based poly results in a yellowish coating, which looks better and matches the flooring. It's smellier, though and requires mineral spirits for clean-up.
Once everything was dry, the tables could be assembled.
I brought the parts into my family room for assembly, since the finished pieces would be too large and heavy for me to drag up the stairs. I used I-Semble steel brackets to tie the tops together, using a scrap cut off as a guide to keep the spacing correct.
The finishing touches were grommeted totes from Bed, Bath, and Beyond to act as storage. We also bought a large television with all the trimmings - which was the point of all this, actually.
I have to admit, though, that I really love the idea of having furniture that you can't buy.
Now, the remaining dark oak end tables in our family room look out of place. That means that there's more to come. Still, I met my goal for this year.


