Sunday, March 16, 2014

Vanity Construction Details


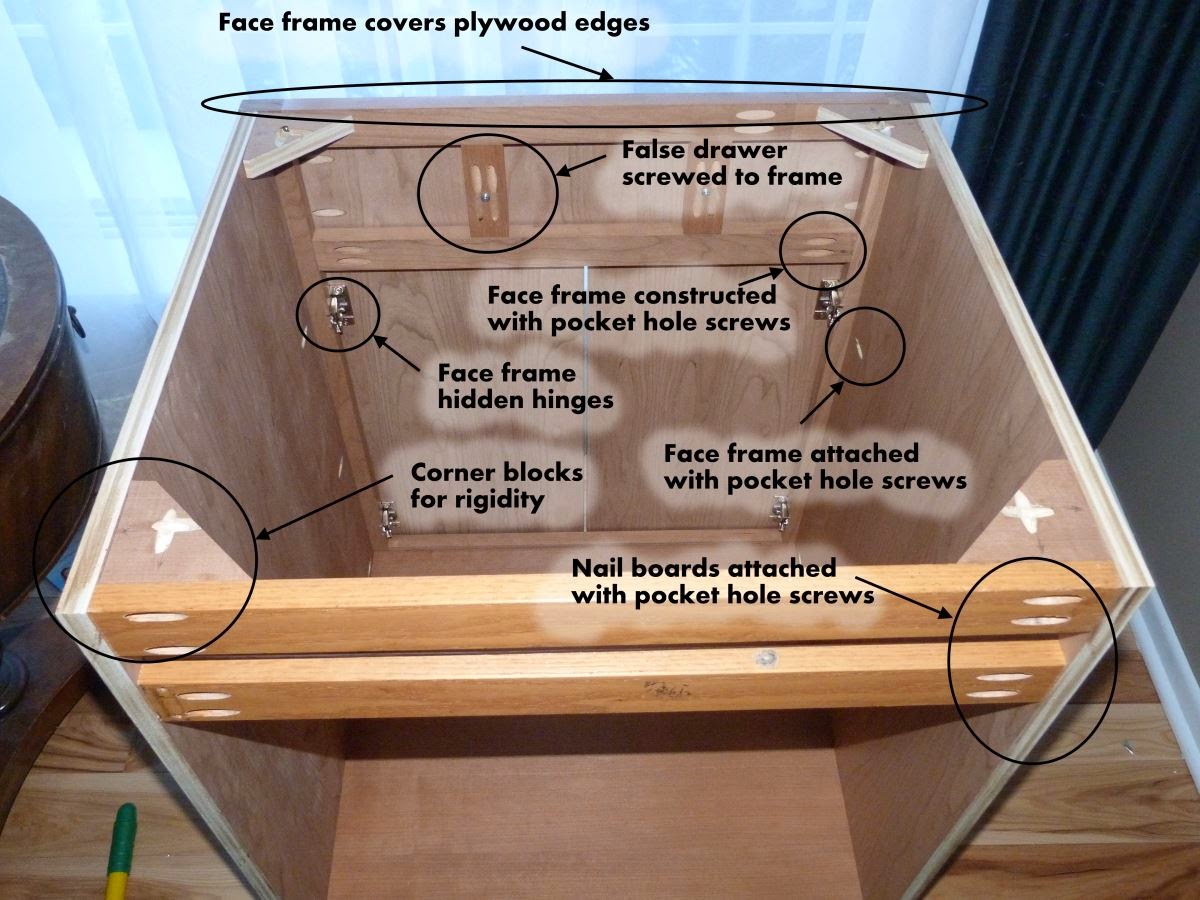
Here's what Sarah's vanity looks like behind the scenes.

The sides are cherry plywood. A cherry plywood bottom is attached using pocket hole screws. In the back are nail boards and the front sports a frame of solid cherry. Corner blocks keep things square and add structural integrity.

The doors are attached using face frame hidden hinges with a 3/4-inch overlay. Since there will be a sink here, the top drawer front is false and is attached to a couple hidden pieces of the face frame. The face frame is attached to the cabinet with pocket hole screws from the sides and from the cabinet floor.

Saturday, March 8, 2014

Vanity Done

We got the vanity assembled. The frame was a little over 3/4-in thick, so the hinge ears bit into the frame. Not a big deal, I guess. Had to snug them down, though, because otherwise the doors would touch when closed. You need to have some gap, even if it is only a millimeter or two.


Not a bad little cherry vanity. It is certainly sturdy and, while it won't win any fashion awards, it works well and does the job. All it needs is a sink top and the handles (easier to install those once it is in place...less chance of damage when moving).

Sunday, March 2, 2014

Kids Vanity Doors and Frame

We edge banded the doors, coated them with water-based polyurethane, and added hidden hinges to them.


We also made and installed a face frame of solid cherry.


This is starting to look like a bathroom vanity.